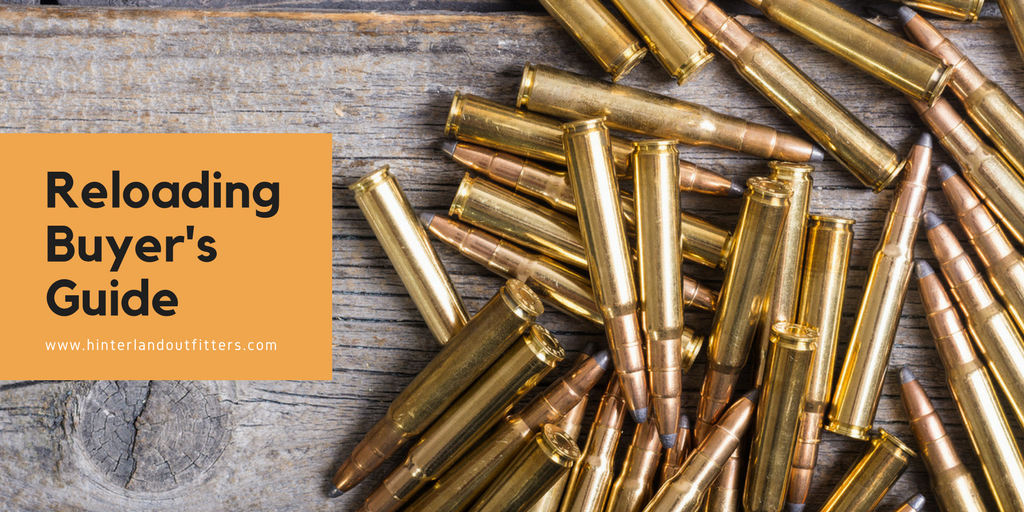
What is Reloading or Handloading?
Reloading, or handloading, is the process of taking used or unprimed brass and reloading it with powder, bullets and new primers. Likewise, you can also reload empty shotgun shells with powder, wadding, primer and shot.
Whether you’re new to owning a firearm, or been a hobbyist for years, you’ve probably heard that reloading can save you some cash when it comes to purchasing ammunition. While it can save you money, it does take an initial investment as well as lots of time and patience, which is why many choose not to reload their own ammo. In this guide, we will break down everything you need to get started reloading your own ammo, and we will walk you through each process of reloading centerfire cartridges as well as shotgun cartridges.
Why Should You Reload Ammunition?
Besides being a hobby for many gun owners and a natural progression for competition shooters to create the perfect shot load, there are several reasons why gun enthusiasts choose to reload or handload their own ammunition.
Economic Value
When it comes to reloading, in order to get the most economic value, one should be more than an occasional shooter. There is quite a bit of equipment that you need to begin reloading your own ammunition, and it can take a while to recoup your initial investment. However, brass casings and shotgun shell hulls are the most expensive components of any cartridge, and these can most often be reused, making bullets or shot the second most expensive component. The ability to reuse spent casings allows shooters to utilize more higher quality ammunition within a set budget.
Increased Performance and Accuracy
Everyone loves saving a bit of money at the checkout counter, but another big reason why many hunters and target shooters choose to reload ammo is the ability to have more control over the cartridge and shot load. Handloading gives you the flexibility to customize your loads with specialized bullets and varying powder loads. A lot of target shooters handload their own ammunition in order to achieve better accuracy and more shot-to-shot consistency, as they can tweak their loads between trips to the range until they have the perfect combination.
Never Run Short
While it doesn’t happen too often, another reason many gun enthusiasts learn the process of handloading is to compensate for commercial ammunition shortages. You may remember hearing about various ammunition shortages from 2008 through 2013. During these periods, handloaders were able to continue going to the range without having to worry about when their local ammo supply shop was going to get in another case of their round of choice.
Tools and Supplies Needed for Reloading
Once you’ve made the decision to begin reloading your own ammunition you will need to invest in some equipment. This initial cost is the most expensive part of the process, as all the components needed to make ready-to-fire cartridges cost less than commercially produced ammunition. One of the best ways to get started is to buy a reloading kit, but we will walk you through the list of reloading supplies and equipment you’ll need:
- Reloading Press: A reloading press is one of the biggest investments in equipment you’ll make when you decide to take the plunge into reloading your own ammunition. Most reloading presses are used for handloading centerfire cartridges, but there are also presses designed for reloading shotgun shells. The press utilizes compound leverage to force reloading dies in and out of brass casings. There are also many different reloading presses to choose from, and you’ll find them categorized as single-stage presses, turret presses and progressive presses. Each of these types of presses is further categorized by a letter (O, C, or H) based on the shape it makes. Single-stage presses are the most basic, while turret presses rotate to allow for the mounting of all dies needed and sometimes allow for two sets of dies to expedite the reloading process. Progressive presses are the most complex and timesaving of the three types. They function like an assembly line, performing a different step on multiple cartridges with each pull.
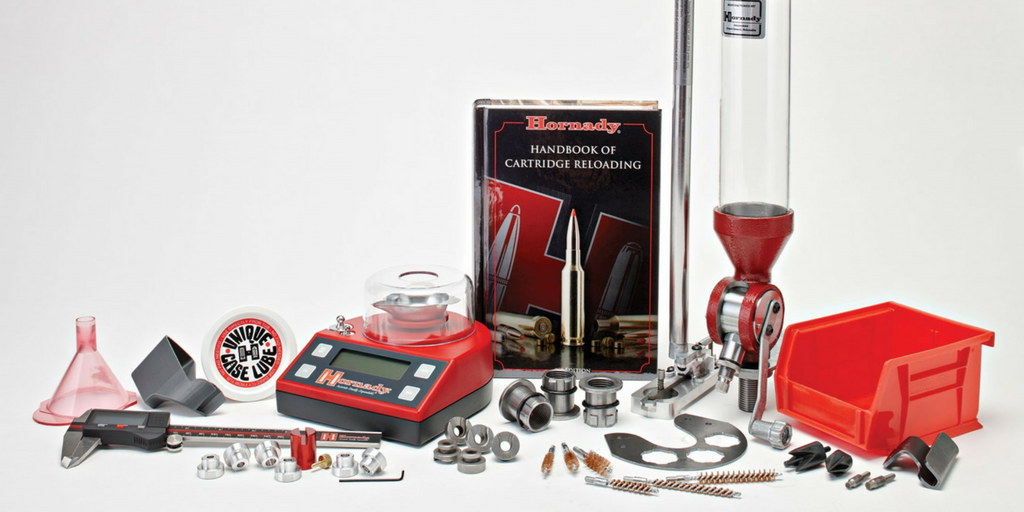
- Reloading Dies: Generally sold in sets of two or three, reloading dies are used along with the reloading press . Reloading dies are screwed onto the reloading press and function as tools to decap, resize, and expand the cartridge and also seat the bullet. You’ll need to pay particular attention to the dies you purchase because they are specific to the caliber and casing type you are reloading. Also, because most dies are crafted from hardened steel, you will need to lubricate them so they function properly. That being said, tungsten carbide dies do not require lubrication because the material is slick enough to work without it.
- Calipers and Micrometers: You’ll need calipers and micrometers to make precise measurements of the casings during the reloading process. In some cases, repurposed casings may stretch after being fired, which will require you to trim them.
- Powder Measure and Funnel: When making precise measurements of powder and loading it into unprimed casings, you’ll need to use a powder measure and funnel. Often, you will find that powder measures come with a funnel attached to them. The powder measures allow you to measure out a safe and correct amount of powder for each shell, ensuring you don’t overcharge your cartridges. Along with a powder measure, you’ll want a powder weight-to-volume conversion chart for a variety of common powders in order to make the proper and precise measurements with each type of powder you use.
- Lube: Used in conjunction with the reloading dies, resizing lube makes sure the dies slide smoothly in and out of the casings.
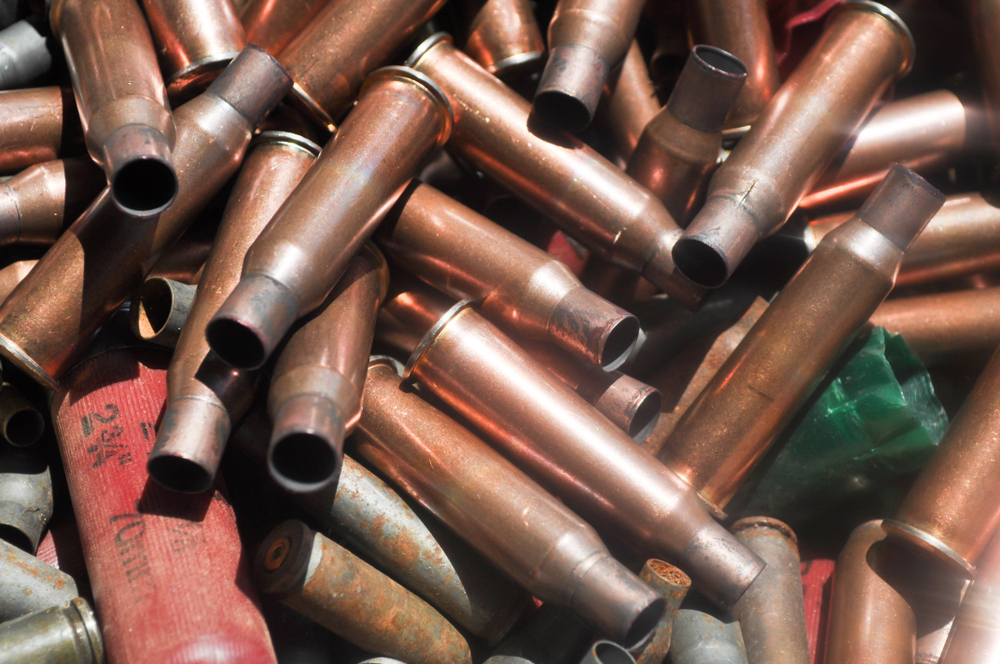
- Unprimed Brass: Reloading brass, or unprimed brass, are high quality brass casings that house the powder and projectile, and they are the only reusable part of a cartridge. You can either buy brand new reloading brass in bulk, or you can collect used brass at the range and remove the old primers. When collecting brass at the range, it’s important to learn how to sort out old or “fake” brass. Steel and aluminum casings are not reusable, but sometimes they are plated in brass or can be confused with nickel-plated brass, which is reusable.
- Reloading Bullets: Reloading bullets come in a variety of styles and materials. They are often cheaper than casings and can easily be bought in bulk to save more money. If you’re feeling extra motivated, you can mold and cast your own bullets using casting lead, which can be easily purchased, or from scrap lead, which can be gathered from sources like old car wheel weights.
- Reloading Blocks: Often overlooked by those new to handloading, reloading blocks and trays help tremendously by keeping all your casings and cartridges organized and secure throughout the reloading process. You can think of them as ice trays for your ammunition.
- Scale: A scale is absolutely necessary when handloading bullets in order to measure extremely precise amounts of powder. Without a scale, you risk overloading your cartridges, which can result in dangerous firing situations. When purchasing a scale, you will want to find one that is at least accurate to 1/10 of a grain, or 6.5 mg.
- Case Trimmers and Shell Tools: Shell casings often stretch when fired, so it’s important to have various case trimmers and shell tools to trim them back to the appropriate size. For ease and consistency, consider die-based trimmers that trim the casings back while leveraging the press.
- Bullet Feeders: Bullet feeders attach to your press, making the reloading process more safe and efficient with a consistent bullet feed. Check out our selection of bullet feeders and bullet feed kits.
- Bullet Pullers: Handloading requires patience and a strong attention to detail. Due to the many precise measurements and steps that go into making a complete cartridge, there are certainly going to be mistakes. You’ll want to invest in a bullet puller, which allows you to correct those mistakes by disassembling your fouled cartridge in a safe manner without harming any of the other components.
- Molds: There are many molds and accessories for casting your own projectiles. Since bullets and shot are the most expensive part of a load that you cannot salvage, many handloaders choose to cast their own bullets. This also gives them more control over the design and weight of their bullets. However, this is a very time-consuming process, and not recommended for beginners.
- Powder Tricklers: Powder tricklers come in handy when weighing out very specific amounts of powder on your scale. Like the name sounds, you just trickle miniscule amounts of powder onto the scale until your desired weight is reached, and you can be assured to have consistent and safe loads every time.
- Charging Bars: Charging bars, or charge bars, are used specifically when reloading shotgun shells. Most charge bars are fixed, meaning that they only accept one type of load. For example, you can buy a fixed charge bar rated at 1-1/8 oz. of lead shot and allowing a specific amount of powder. There are, however, other types of charge bars that are drilled to accommodate varying types and amounts of shot and powder. When purchasing charge bars, make sure you pay attention to whether they are rated for lead or steel shot— otherwise, you may make mistakes when loading the wrong type of shot with a given charge bar.
- Priming Accessories: Whether you are buying brand new brass, or reusing old casings, you’ll need to re-prime them as part of the reloading process. There is a large variety of priming accessories and priming tools available to help you prime your cartridges. Some priming tools attach onto your press, making the process more efficient and simple. Also, it’s important to make sure you are purchasing the right primers when reloading as there are essentially four different types of primers: rifle, handgun, large and small. You should be able to find out what kind of primers your casings accept by looking online or on the box.
- Wadding: Wads are used for reloading shotgun shells, and there are different types of wads needed throughout the process: over-powder wad, shot wad and over-shot wad.
Guide to Reloading Your Own Rifle or Pistol Ammunition

We are now going to walk you through the process of reloading centerfire cartridges (rifle and pistol), step-by-step. This process is tedious and time-consuming, and it requires great attention to detail because you do not want to overload a cartridge or make other mistakes that could result in a round that is dangerous to fire.
The process will vary a little depending on the type of press you use. For this guide, we will discuss the process of using a basic, single-stage press, as that one requires the most steps. In a sense, it’s the same steps for all presses, just some allow for multiple steps to be done with a single pull of the press’s lever (e.g. progressive presses). To save time, you’ll want to perform each of these steps with groups of cases and cartridges, so you can avoid swapping components out constantly.
- Step 1: Clean and check your brass. Use a microfiber or soft cloth to wipe each case clean. Be sure to check for any dirt or grime that could scratch the brass or the dies. Also, look for any defects in the brass cases, including split case mouths, large bulges and case head separations, and throw those cases away. These can result in a faulty load that is unsafe to fire.
- Step 2: Lubricate the cases both inside and out. For the outside of the casing, spread a bit of lube on a pad and roll the cases on it to lube the outside wall—this will help ensure a smooth function with the sizing die. If you are using tungsten carbide dies, you do not need to lube the outside of the casings. Also, use a brush to spread a bit of lube inside each of the cases, as this will help reduce working the brass too much.
- Step 3: Install the shell holder to your reloading press. You’ll need to make sure you have the right size shell holder for the cases you’re using, as the shell holder will grip the head of your brass casing and keep it secure as you force the dies into it.
- Step 4: Attach the sizer die to your press, and make sure the ram of your press touches the die at the top of the press stroke (when you pull the lever all the way). Then raise the handle and twist the die another 1/8 to ¼ turn lower. If you are using a tungsten carbide die, you’ll want to leave a 1/16” space between the shell holder and the bottom of the die.
- Step 5: Slide a case into the shell holder and make sure it is secure.
- Step 6: Slowly but firmly begin lowering the handle of the press until it reaches the bottom of the pull. The case should slide into the sizer die, which will size the case to the correct dimension, as cases will sometimes warp when fired or may come somewhat wrongly sized. The sizer die will also push out any old primers in the casings. Raise the handle back into its starting position, pull the sizer die out of the case and lower the shell to be removed from the press.
- Step 7: Check the length of your cases and trim any if necessary. As cases are fired, they will tend to stretch beyond the safe maximum length, so you’ll need to check the correct length using a dial or digital caliper. If a case is longer than the noted maximum length, you’ll need to use a case trimmer to shave it back to the proper length.
- Step 8: Any cases you have trimmed will then need to be chambered and deburred with a deburring tool in order to remove any burrs that could inhibit the proper seating of a bullet.
- Step 9: If working with straight-walled cases, you’ll now need to use the separate expanding die, which will slightly expand the case mouth in order for the bullet to seat properly. Install the sizing die to the press, and run your cases through it. If you are working with bottlenecked cases, your sizing die will have done this during step 6.
- Step 10: Now it’s time to prime the cases, and this can be done in a couple different ways. Often, your priming tools or reloading kit will include a priming tray. You’ll want to scatter a small handful of primers onto the tray and shake them until their anvil sides are up. You can then use a separate hand-priming tool to prime the cases, and sometimes the priming tray will attach to this tool to slightly load primers into place for you. You can also use the press to prime the cases. You’ll want to install the sizing die and put a primer anvil side up on the primer arm. Place a case in the shell holder and pull the lever so the case goes up into the sizing die. As you push the lever back up, the case will come out of the sizing die, and the new primer will be seated into the case. Before you move onto another case, make sure you check the primer to ensure it was seated properly, otherwise you’ll want to remove it and try again.
- Step 11: Get your powder measure and fill the hopper with the powder you plan to use. You’ll want to check what weight of powder your charge requires for the specific grain of powder you’re using. Dispense a few charges of powder to make sure there is a steady flow of powder. Now, begin weighing your charges using a scale, and adjust your powder measure until it is giving you your desired powder measurements consistently. Then, use a funnel to load charges into the cases. It’s a good idea to weigh a charge every 4-5 cases in order to make sure you’re still getting consistent charges.
- Step 12: After you’ve filled all your cases with powder, it’s time to seat the bullets. Attach your seating die to the press, place a case into the shell holder, and press the case up to the top, using a full pull of the lever. Twist the die down until it stops and hits the top of the shell casing or shoulder of the bottlenecked case. Back the die out of the press one turn, so it rises just above the shell, and lock it into place. Next, loosen the locknut on top of the bullet seater die, and unscrew the plug far enough so the bullet won’t be seated too deep. Place a primed case into the press and a bullet into the top of the case—you may need to hold the bullet in place as you push it up into the press. Press the case and bullet up into the seating die to seat the bullet in the case. With your first completed cartridge, measure how deep your bullet was seated, and adjust the seat plug until you have the bullet seating at the correct depth. Then, lock the plug in place with the locknut, so the rest of your bullets sit at a consistent depth. You may need to use a bullet puller to remove a bullet seated too far, so you can salvage the components.
These 12 steps will give you ready-to-fire cartridges. In the first rounds, there will be some mistakes. The reloading process takes time, patience and practice to get right, but if you put time into it, you can enjoy all the benefits of reloading your own ammunition.
Guide to Reloading Shotgun Shells
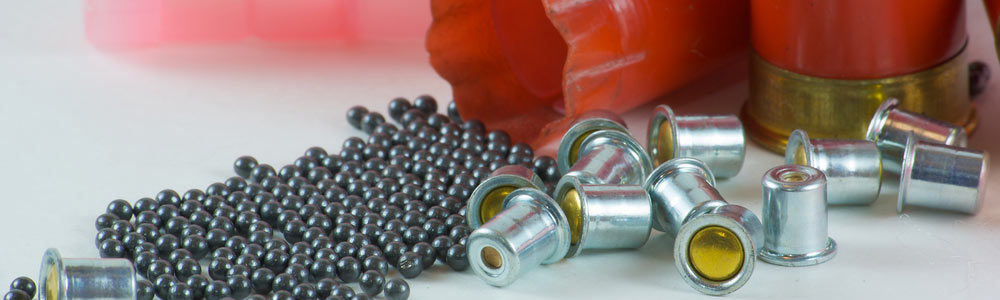
Reloading shotgun shells is much easier than handloading centerfire cartridges. The following guide will help explain the step-by-step process of handloading shotgun shells with powder, wadding and shot. The steps below will explain how to reload shot shells using a single-stage press.
- Step 1: The first thing you want to do is inspect your hulls for flaws. Even if you’re using brand new hulls, you’ll want to make sure there aren’t any defective ones in the box. Most modern hulls should last around a dozen shots, but it’s always better to err on the side of your gut. If you need to take a second glance at a hull because part of the crimp could be developing a crack or maybe the plastic appears to be separating from the brass, you should certainly toss the hull.
- Step 2: Once the hulls have been checked, they’ll need to be resized. There are a couple ways to do this. For one, a steel-fingered sleeve can be slid onto the brass in order to squeeze it down to proper size. Another way is to force a full-length resizing die down over the entire hull, which will hold the shell in place through the rest of the reloading process.
- Step 3: Now you need to de-prime the spent cartridge by forcing a depriming pin down through the hull to push out the old primer. Priming pins are gauge-specific, so it’s important to have the right pin in place. Also, be careful not to push the depriming pin too far because you risk damaging the hull’s base wad. Finally, never try to force out a live primer because you may accidentally cause it to detonate.
- Step 4: Re-priming the shot shells comes next, and must be done carefully, as shotgun primers can detonate if mishandled. Seating a primer is relatively easy, and you’ll know it’s correctly seated if it’s flush with the bottom of the brass base. Shotgun primers have been standardized to be #209 size; however, they are built to have varying levels of energy for different types of loads. Make sure you are using the correct primer for the load you are trying to make so it fires properly.
- Step 5: After re-priming the shell, you’ll want to drop powder into it. Shotgun loaders have bushings that control the measure of powder being dropped into the shell. Bushings are designed to drop a specific measure of powder, so you’ll need to make sure you’re using the right bushing for the load you’re creating. However, some modern presses have dropping systems that eliminate the need to swap out bushings.
- Step 6: Now you need to seat the wad or shot mcup. Wads are designed in a wide variety of sizes and thicknesses for different types of loads. It’s important that you use the proper wad for the load you’re creating. Just refer to your load recipe for this information. Seating the wad is relatively easy by using the press’s wad guide. Just firmly press the wad down into the shell, over the powder. Be careful not to seat it too hard. You’ll know it’s in the right place when the tips of the wad petals are just beneath the crimping line. For hunting loads, sometimes an additional filler wad (or two) must be used and placed in after the initial wad or shotcup and before you drop shot. These filler wads are usually made from cork, cardboard or felt, and they come in a vast array of sizes and thicknesses.
- Step 7: Dropping shot requires you to use the same bushing or charge bar you used for dropping the powder, as they are designed for a specific load. All you have to do is pull the lever and drop the pre-measured amount of shot into the shot cup or over the wad, and you’re ready to crimp.
- Step 8: Before you start crimping, make sure to count the folds on top of your hulls. This will tell you which crimp-starter to use. For example, if your hull has 6 points, you’ll use a 6-point crimp-starter. Old hulls should start relatively easily, while new, unfired hulls may need to be pressed a couple times with the crimp-starter to get them to set properly. The final crimping press closes the hull completely, leaving a flat surface along the top. A good crimp will look like a smooth swirl with a very tiny hole in the center and no signs of being crushed together. You should be left with about a 1/16” to 1/10” deep closure.
- Step 9: Your shells have now been reloaded, but you’re not quite done yet. Make sure to mark your shells. This is important, especially when re-using old shells because the markings they have may not be the same as what you just loaded into them, and you don’t want to come back to your shells down the road and not remember which ones are which.
You can save time reloading your shot shells by using a progressive press, which will perform different tasks on several shells at once. However, with a single-stage press, you should be able to load a box of shells in around 10 minutes, and you’ll be able to pay closer attention to every load.
Reloading Tips to Remember
Keep in mind this is only a beginner’s guide to reloading. There are many books and online videos that will further explain the process. It’s important to completely understand this process before getting started.
Ammunition that has not been properly loaded can be extremely dangerous!
Reloading ammunition is a tedious process, and while it will save you money in the long run, there are initial costs as you invest in equipment and bulk components. If you shoot often, you’ll make up the cost quickly. If you get more into precision and sport shooting you will also appreciate the custom loads you can create with reloading.
Remember to:
- Pay close attention to detail, as each reloading process involves many steps and one mistake will send you back to the beginning.
- Be patient and go slow, as the more careful you are, the more consistent and accurate your loads will be.
- Stay organized during the process. Keeping your workstation clean and tidy will make the process easier and more efficient. Invest in reloading blocks and ammo boxes.
In the end, you’ll appreciate the time and energy you put into making your own ammunition. You’ll find that you always have a supply of ammo on hand, and you’ll feel more comfortable shooting.
Hinterland Outfitters Has All the Reloading Supplies You Need
We hope this guide has helped you figure out what to buy to get started reloading your ammunition. Here at Hinterland Outfitters, we have all the reloading supplies you need. From full reloading starter kits to individual accessories, you’ll be loading shotshells and rifle cartridges in no time. Feel free to contact us today with any questions you may have. Our customer service team is standing by to help you choose the best equipment for your reloading needs.