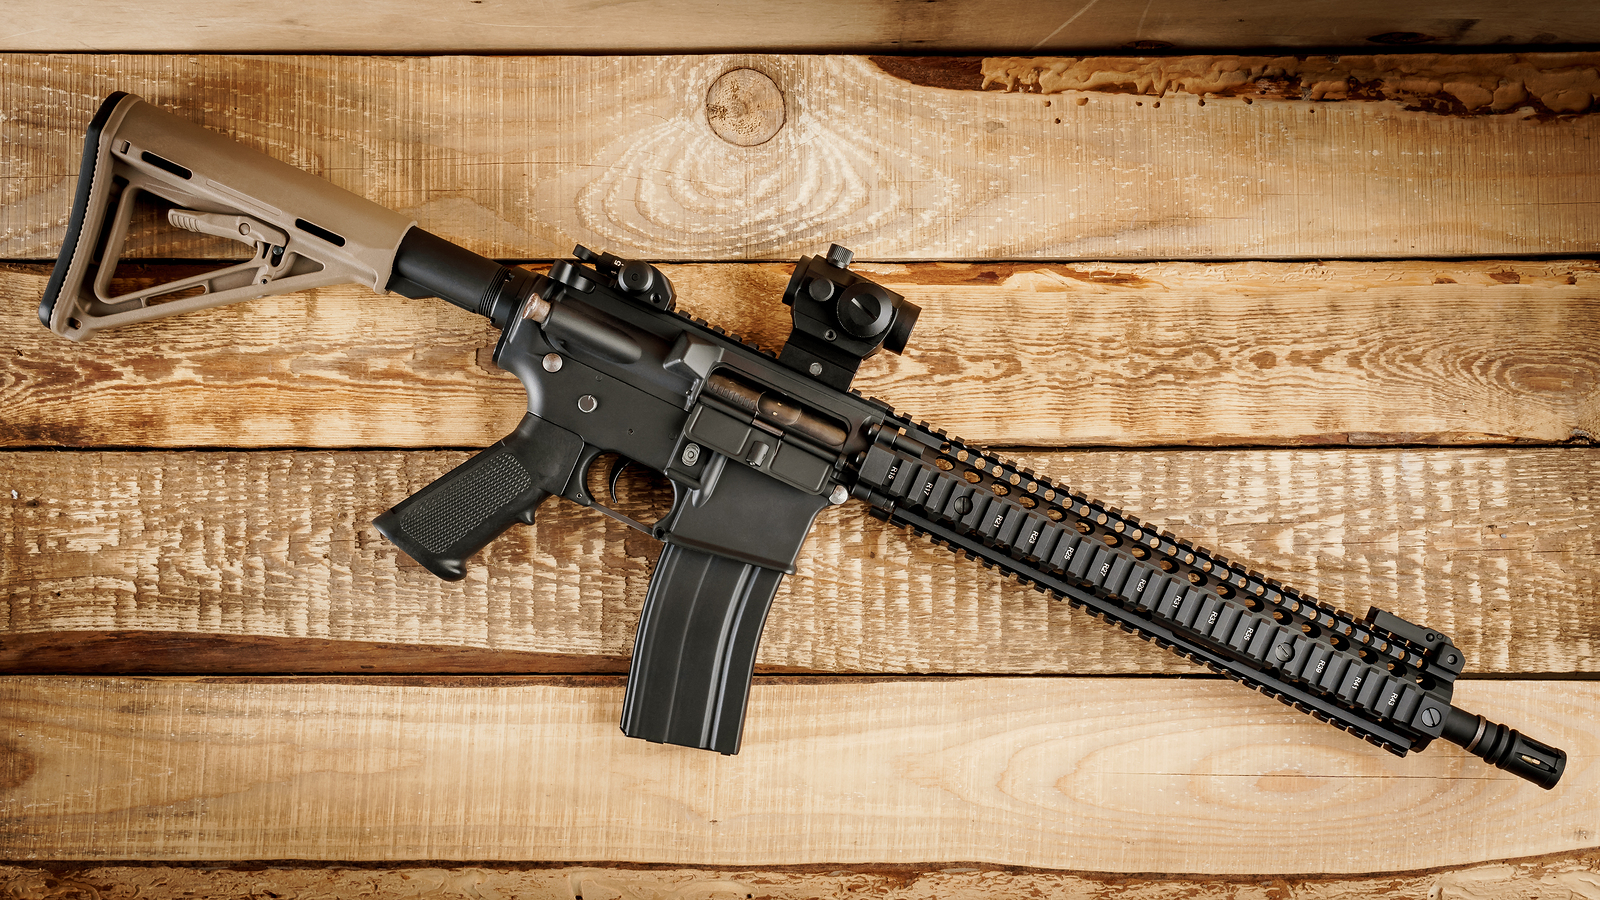
More than 5 million U.S. citizens now own a semi-automatic AR-15. AR-15s are sometimes incorrectly referred to as assault rifles, which by definition must be capable of fully automatic firing. The AR designation doesn’t stand for “assault rifle;” rather, it stands for Armalite Rifles, the Fairchild Aircraft division that developed the AR-15 during the 1950s. After several modifications, the AR-15 became the fully automatic, select fire M16 rifle, which the U.S. Military still uses today.
About AR-15
Also known as Modern Sporting Rifles, or MSRs, there are close to 100 U.S. firearm manufacturers that make AR-15 rifles. What many people don’t realize is that it’s legal to build your own, which is actually a fairly simple process.
Neither a Federal Firearms License (FFL) nor a gunsmith’s license is needed to legally build an AR-15. An exception is if a completed, commercially manufactured lower receiver is to be used, it must be purchased through a federally licensed gun dealer. The completed lower receiver will bear a serial number, and will subject the buyer to the same background check and waiting period requirements as if he or she were purchasing a fully assembled AR-15. The reason is that the Bureau of Alcohol, Tobacco, Firearms and Explosives ATF considers a completed, commercially manufactured lower receiver to be the same as an entire rifle because it includes the firearms fire control group. A completed lower receiver is the only part of an AR-15 that’s required to bear a serial number.
The option to purchase a completed lower receiver through an FFL dealer and avoiding serialization and registration is to create your own lower receiver from a blank using a computer numerical control (CNC) machine for the needed millwork.
A much easier solution, however, is to buy an “80%” receiver and complete the remaining milling yourself. An 80% receiver has portions that haven’t yet been machine cut, which makes the part useless in its present state. Unlike a fully completed lower receiver, an 80% lower isn’t considered to be a firearm, and therefore it’s not subject to the same regulations and restrictions as a fully finished lower, including serialization, FFL transfer and filing an ATF Form 4473 Firearms Transaction Record. State and local laws governing owner-built AR-15s are the same as buying a factory-assembled AR-15, which can vary among localities. Some states such as New York, however, require registration of self-built AR-15s, so check carefully before proceeding. AR-15 rifles built from an 80% lower receiver may never be sold or transferred by the individual who built the firearm. It must stay in their possession for the life of the rifle.
There are no limits on the number of AR-15s an individual can build for personal use. It’s possible to sell or transfer a home-built AR-15, so long as it was originally made for personal use and built using a serialized lower receiver. ATF requires that the sale or transfer of a home-built AR be to an individual residing in the same state, and expressly excludes selling or gifting the firearm to prohibited persons, such as a convicted felon. The seller is not required to perform a background check on the purchaser prior to the sale. Keep in mind, many states may have additional restrictions so it’s important to understand your local and state laws.
Reasons for Building an AR-15
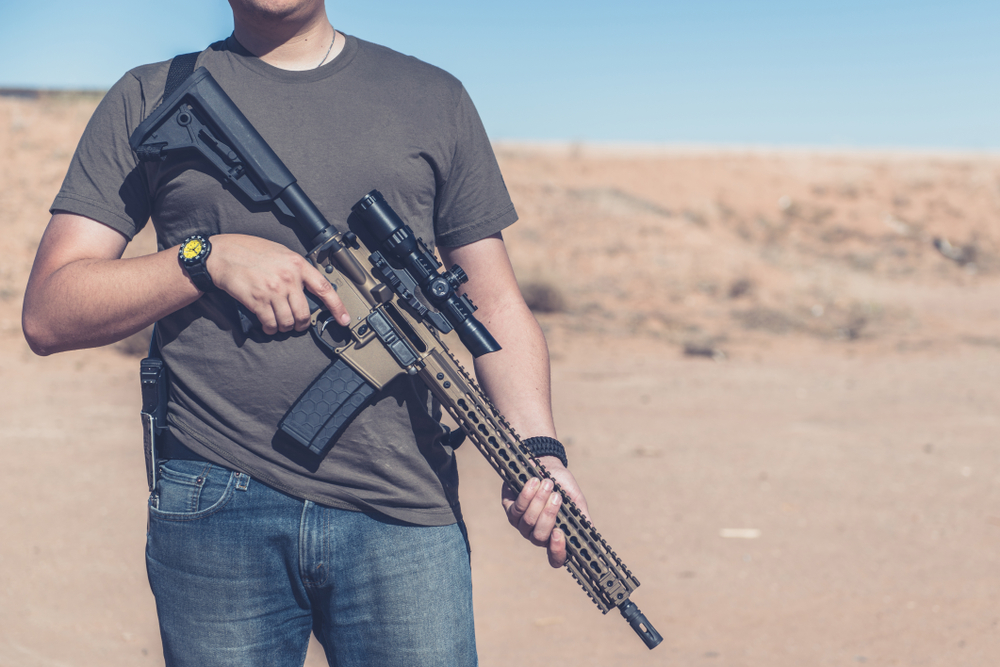
Over the past few years, building an AR-15 rather than purchasing an off-the-shelf, fully assembled rifle has become increasingly popular. One of the reasons is cost. Although it’s not always the most economical way to go, it’s often cheaper to build a basic AR-15 for defensive or target shooting rather than purchasing a factory assembled version.
Another reason many people prefer to build rather than buy an AR-15 is customization. Items such as upper receivers, barrel lengths and linings, stock types, optics and seemingly limitless other options can all be purchased separately, resulting in the finished product being a truly personalized firearm.
Lastly, there’s the sheer satisfaction and pride that come with undertaking and completing a project.
Decide How Your AR-15 Will be Used
Since this presumably will be a highly customized build, determine in advance how it will primarily be used. Different uses call for different parts and accessories.
The three most common uses for AR-15 rifles are self-defense, hunting and target shooting. The caliber, barrel length and type, optics and other parts will differ among the three. You can learn more about what to look for via our AR-15 Buyer’s Guide.
Anatomy of a Basic AR-15
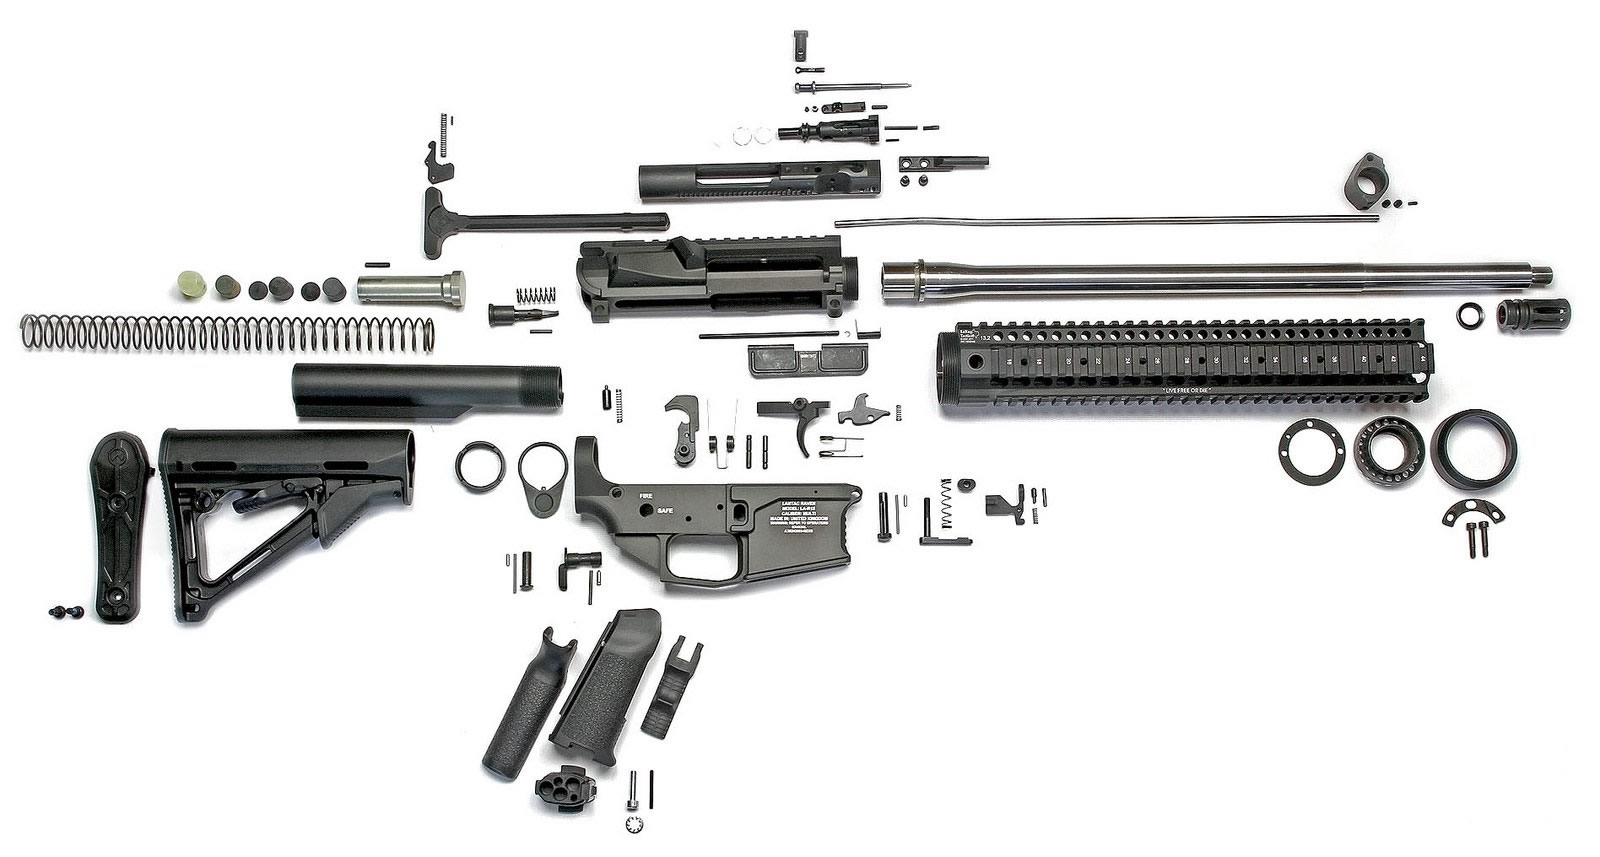
An AR-15’s four main parts are the upper receiver, lower receiver, barrel and stock, each of which have several subcomponents.
Upper Receiver Group
The upper receiver houses the firing mechanism, including the bolt carrier group, which is the device that holds the hammer, bolt, firing pin and spent cartridge extractor and ejector. Toward the rear of the upper receiver is the charging handle, which, when manually pulled back and released, opens the ejection port cover, strips a fresh round from the magazine and inserts it into the empty chamber. The forward assist assembly is located near the bolt closure on the upper receiver. Its purpose is to push the bolt carrier forward to ensure that it’s properly seated and locked.
Barrel and Forend
AR-15 barrels are usually made from chromoly steel or stainless steel. Chrome-lined barrels will resist corrosion and outlast non-lined barrels, although they’re slightly less accurate and more expensive than unlined barrels. Stainless steel barrels are highly corrosion resistant and will withstand the heat from prolonged shooting better than chromoly barrels.
The barrel is attached directly into the threaded forend of the upper receiver. The barrel also houses the gas block that regulates the volume of gas released into the gas return tube when a round is fired. The pressurized gas forces the bolt carrier back, which ejects an empty cartridge casing and chambers a fresh round.
The rail system and handguard are attached beneath the barrel. They’re used to add accessories such as lasers, tactical flashlights, vertical grips and more for a truly customized configuration. Most rails are removable, making it easy to quickly change accessories to adapt the rifle for different shooting situations.
The upper receiver also holds the ejection port cover that keeps dust and debris from entering and fouling the firing mechanism.
Muzzle devices are detachable pieces of equipment threaded on to the AR-15’s muzzle. The three primary types of muzzle devices are compensators that reduce vertical barrel climb when the weapon is fired, muzzle brakes, which lessen recoil by redirecting a portion of the gas released when a round is fired and flash suppressors that hide the combustion of unburned gunpowder as it bursts into flame after the projectile leaves the muzzle
Lower Receiver Group
Most AR-15 lower receivers are made from cast, billeted or forged aluminum, and are the component that makes the AR-15 a firearm. It’s the part of the rifle that contains the fire control group, which is why the ATF requires a factory completed lower to have a serial number and bear the name of the manufacturer. Unlike factory completed or stripped lowers, 80% lower receivers used for home-built AR-15s require neither a serial number nor federal registration.

- The trigger group, which is installed in the lower receiver, is made up of the trigger itself, along with the hammer and the disconnector that holds the hammer until the trigger is pulled.
- The housed in the rifle’s stock consists of a plunger and spring within a tube that helps reduce recoil. When a round is fired, gas released through the gas block into the gas return tube drives back the bolt and carrier, which compresses the buffer spring and absorbs the recoil. The energy stored in the compressed spring is then released, forcing the buffer, bolt and carrier forward, returning them to their original positions.
- There are literally hundreds of butt stocks available for AR-15 rifles, although not all will accommodate every type of buffer assembly. It’s recommended that you decide on the type of butt stock you plan to use before purchasing the buffer assembly to ensure the two are compatible.
AR-15 stocks come in both fixed and adjustable versions. Fixed butt stocks are rigid, and are best for field situations, such as long-range hunting or competition shooting. Examples of fixed stocks are the A2 and Magpul MOE.
By far the most popular and versatile but less durable than fixed stocks, AR-15 adjustable butt stocks, such as the VLTOR MOE and Daniel Defense collapsible butt stock, allow the stock to be adjusted to precisely fit the shooter’s height and shooting stance. Some states now prohibit collapsible stocks, so once again, do your research before purchasing a butt stock.
- AR-15s use detachable box magazines that fit into an opening cut into the lower receiver. Their function is to hold ammunition until it’s ready to be spring-fed into the breach and seated in the chamber by the rifle’s firing mechanism. Most factory-built AR-15s come with 30-round magazines, although after-market magazines that hold as many as 100 rounds are available for purchase. Some states, including California, Connecticut, Massachusetts and New York, either restrict or prohibit magazines that hold more than 10 rounds. It’s important to check your local and state laws in your area.
Magazines are removed by pressing the lower receiver’s magazine release button. Empty magazines are reloaded by inserting fresh rounds into the top until it’s filled. An advantage of removable magazines is that multiple preloaded spares can be carried until needed. When an empty magazine is released and removed, it can quickly be replaced with a fully loaded spare.
- Named for their resemblance to the angled grips on handguns, pistol grips are attached to the lower receiver just behind the trigger assembly. They’re ergonomically designed for shooting comfort and stability, which translate directly to improved accuracy. Some pistol grips, including the MAGPUL MOE Grip, are hollow with a hinged, capped bottom that can be used to store items such as a spare bolt, optics batteries or small tools for making adjustments in the field.
- Foregrips are usually attached beneath an AR-15’s barrel to a Picatinny rail. The two types are angled like MAGPUL’s AFG foregrip series, or vertical “broomstick” foregrips such as the Daniel Defense Vertical Foregrip. Both types are intended to improve stability and give the shooter increased control over the firearm. Foregrips also prevent burns to the non-trigger hand when the barrel or rail overheat from high volume shooting.
Building an AR-15
There are four basic methods for assembling an AR-15, which are to:
- Attach a pre-assembled lower receiver to a pre-assembled upper receiver
- Build the upper receiver and attach it to a pre-assembled lower receiver
- Build the lower receiver and attach it to a pre-assembled upper receiver
- Use part kits and standard components, including an 80% lower receiver
Someone with previous experience can build an AR-15 with an 80% lower receiver using parts kits and standard components in a few hours from start to finish, although most beginners find that about eight hours are needed.
Tools Needed to Build an AR-15
Here are the basic tools you’ll need to build an AR-15, some of which you probably already have:
- Workbench with vise
- Upper and lower receiver blocks to securely hold aluminum parts without crushing them
- Set of punches, including roll pin punches, for seating pins
- Steel ball peen hammer
- Nylon or brass hammer that won’t mar or damage parts
- Combination wrench for assembling the buffer tube, barrel nut and muzzle devices
- Torque wrench
- Screwdriver set with hex heads
- Head space gauges
Most of these items can be found in Aim Sports’AR-15 Armorer’s Build Kit, which contains the tools needed to assemble a lower receiver and install the barrel on an AR-15 upper receiver.
Here are the basic parts needed to build an AR-15:
- Upper receiver with assembly parts kit
- Lower receivers and assembly parts kit
- Buffer with buffer tube
- Buffer spring for lower receiver extension
- Barrel
- Gas block system
- Handguard or foregrip compatible with the gas block system
- Bolt carrier group to match the barrel and cartridge
- Butt stock (fixed or collapsible)
- Magazines
Overview of Steps to Assemble an AR-15
AR Upper Assembly
The upper receiver, which houses the bolt, bolt carrier, forward assist and charging handle, can be purchased with all components preinstalled, or as a stripped, empty receiver to which the individual parts will be added. Upper receivers are assembled in the following order:
- Attach the forward assist assembly to the upper receiver
- Install the ejection port cover
- Assemble the bolt carrier and charging handle
- Install the assembled bolt carrier and charging handle into the upper receiver
- Clamp the action block around upper receiver halves to prevent them from being marred, crushed or destroyed and tighten them in a vise
- Attach the threaded barrel using the outer receiver nut and inner barrel retainer nut
- Install the gas return tube and gas block
- Attach a handguard or foregrip compatible with the gas block system
AR Lower Assembly
A complete lower receiver has all components, including a butt stock, factory installed. Complete lowers come ready to attach to an AR-15’s upper receiver. Remember that complete lowers are serialized, and must be purchased through and registered by an FFL gun dealer.
A stripped lower receiver has been machined and milled by the manufacturer, and comes ready to drop in individual components, including the trigger group, buffer tune assembly and buttstock. Stripped lowers are considered by the ATF to be firearms and, as with complete lowers, must bear a serial number and be purchased through and registered by a licensed gun dealer.
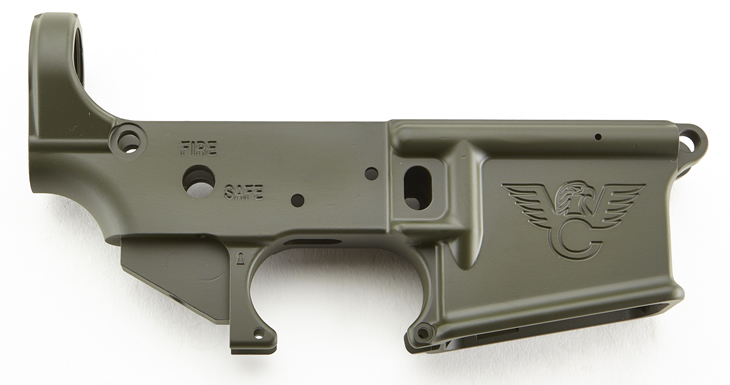
An 80% lower has been partially completed by the manufacturer, but will need final milling and drilling by the gun builder. Since 80% lowers aren’t ready to receive the trigger/fire control group, the ATF doesn’t consider them to be firearms. They aren’t required to be serialized or registered, and can be ordered directly online without going through a licensed gun dealer. The individual parts needed to finish building an 80% lower can be purchased separately, although a much easier method is to order a lower receiver parts kit that contains everything you need to complete the lower receiver.
Finishing an 80% Lower Receiver
Most lower receivers, whether complete, stripped or 80%, are made from either billet or forged aluminum. Billet lower receivers are aircraft grade aluminum shaped by machine. Forged lowers are made from aluminum compressed into shape, which add to their strength. Because of their durability, forged lowers are best for AR-15s that will be frequently and heavily used.
80% lowers are aluminum receiver blanks with solid areas that have yet to be milled to accept the fire control group. Because 80% lowers still need some finishing, you’ll need a lower drill jig with templates and access to a drill press in addition to the tools listed above.
After the final machining has been completed, what was earlier an 80% lowers is essentially a stripped receiver ready to receive components. Here’s an overview of the assembly sequence following the instructions that come with a lower receiver parts kit:
- Install the magazine catch assembly, which consists of a release spring, release button and the catch itself
- Install the trigger guard assembly, securing it with roll pins
- Install the bolt catch mechanism, which includes the spring, plunger and the catch itself
- Using the trigger, disconnector, springs and pins included with the assembly kit, put together the trigger assembly
- Following the instruction in the parts kit, assemble and install the safety mechanism and takedown pins
- Insert the safety selector and detent catch
- Attach the pistol grip using a screw and washer
- Install the buffer retainer, spring and endplate
- Screw the buffer tube into the lower receiver’s body
- Insert the buffer spring into the buffer tube
- Slide the completed buffer tube assembly into the butt stock, using the stock’s adjustment tab to set the distance
The assembled upper and lower receivers are now ready to be joined with a rear takedown pin and front pivot pin, both of which are held in place by detents. Construction of the AR-15 is now complete, and it’s ready for adding optional equipment and accessories.
When working on finishing your AR-15, remember to always wear safety glasses to protect your eyes from metal shavings, lubricants, pins, springs and other small parts that can unintentionally be released and fly across the room. It’s also a good idea to wear a shop apron while working to protect your clothing.
Adding Accessories and Options
Now that it’s been fully assembled, it’s time to personalize your AR-15 by attaching options or “furniture,” such as swivels and slings, tactical flashlights, lasers, red dot sights and scopes and optics, custom grips and forends, recoil pads, bipods, suppressors – you name it!
Not all accessories are legal in all locations. Be sure to check state and local regulations before ordering accessories for your new AR-15.
Getting Started
The real satisfaction from building and customizing an AR-15 is taking it to the firing range and using it for the first time. Get started in this fascinating and rewarding hobby by contacting Hinterland Outfitters by email at sales@blog.hinterlandoutfitters.com or call us at 877-446-8370. One of our friendly and knowledgeable team members will take the hassle and confusion out of selecting the right receiver combinations, barrels, stocks and accessories for your planned build at prices sure to fit your budget.